
Part 2: Assessment of Dampness in Buildings
Surveying Types of Dampness
Before treating a wall for rising damp, it is essential to determine whether the dampness in the wall can be solely attributed to rising damp – or whether other causes such as condensation or rain penetration may be contributing to the dampness. The solutions described in this guide are solely for the treatment of rising damp. Solutions for other types of dampness can be found in our damp section.
The Survey
It is essential when investigating the potential for rising dampness to eliminate other sources of water ingress. Care must be taken to eliminate other potential sources of moisture, especially condensation in the colder months, and it is therefore essential to ensure that a full investigation is always undertaken. If any other sources are identified then these must be first eliminated before a proper assessment of any rising dampness can be made as it can be very difficult to distinguish between two or more interfering sources of water ingress.
Should it be noted that previous damp‐proofing works have been undertaken then it is essential to take great care ensuring that the evidence of dampness is correctly evaluated. The following gives a guide to on‐site routine procedures for the survey:
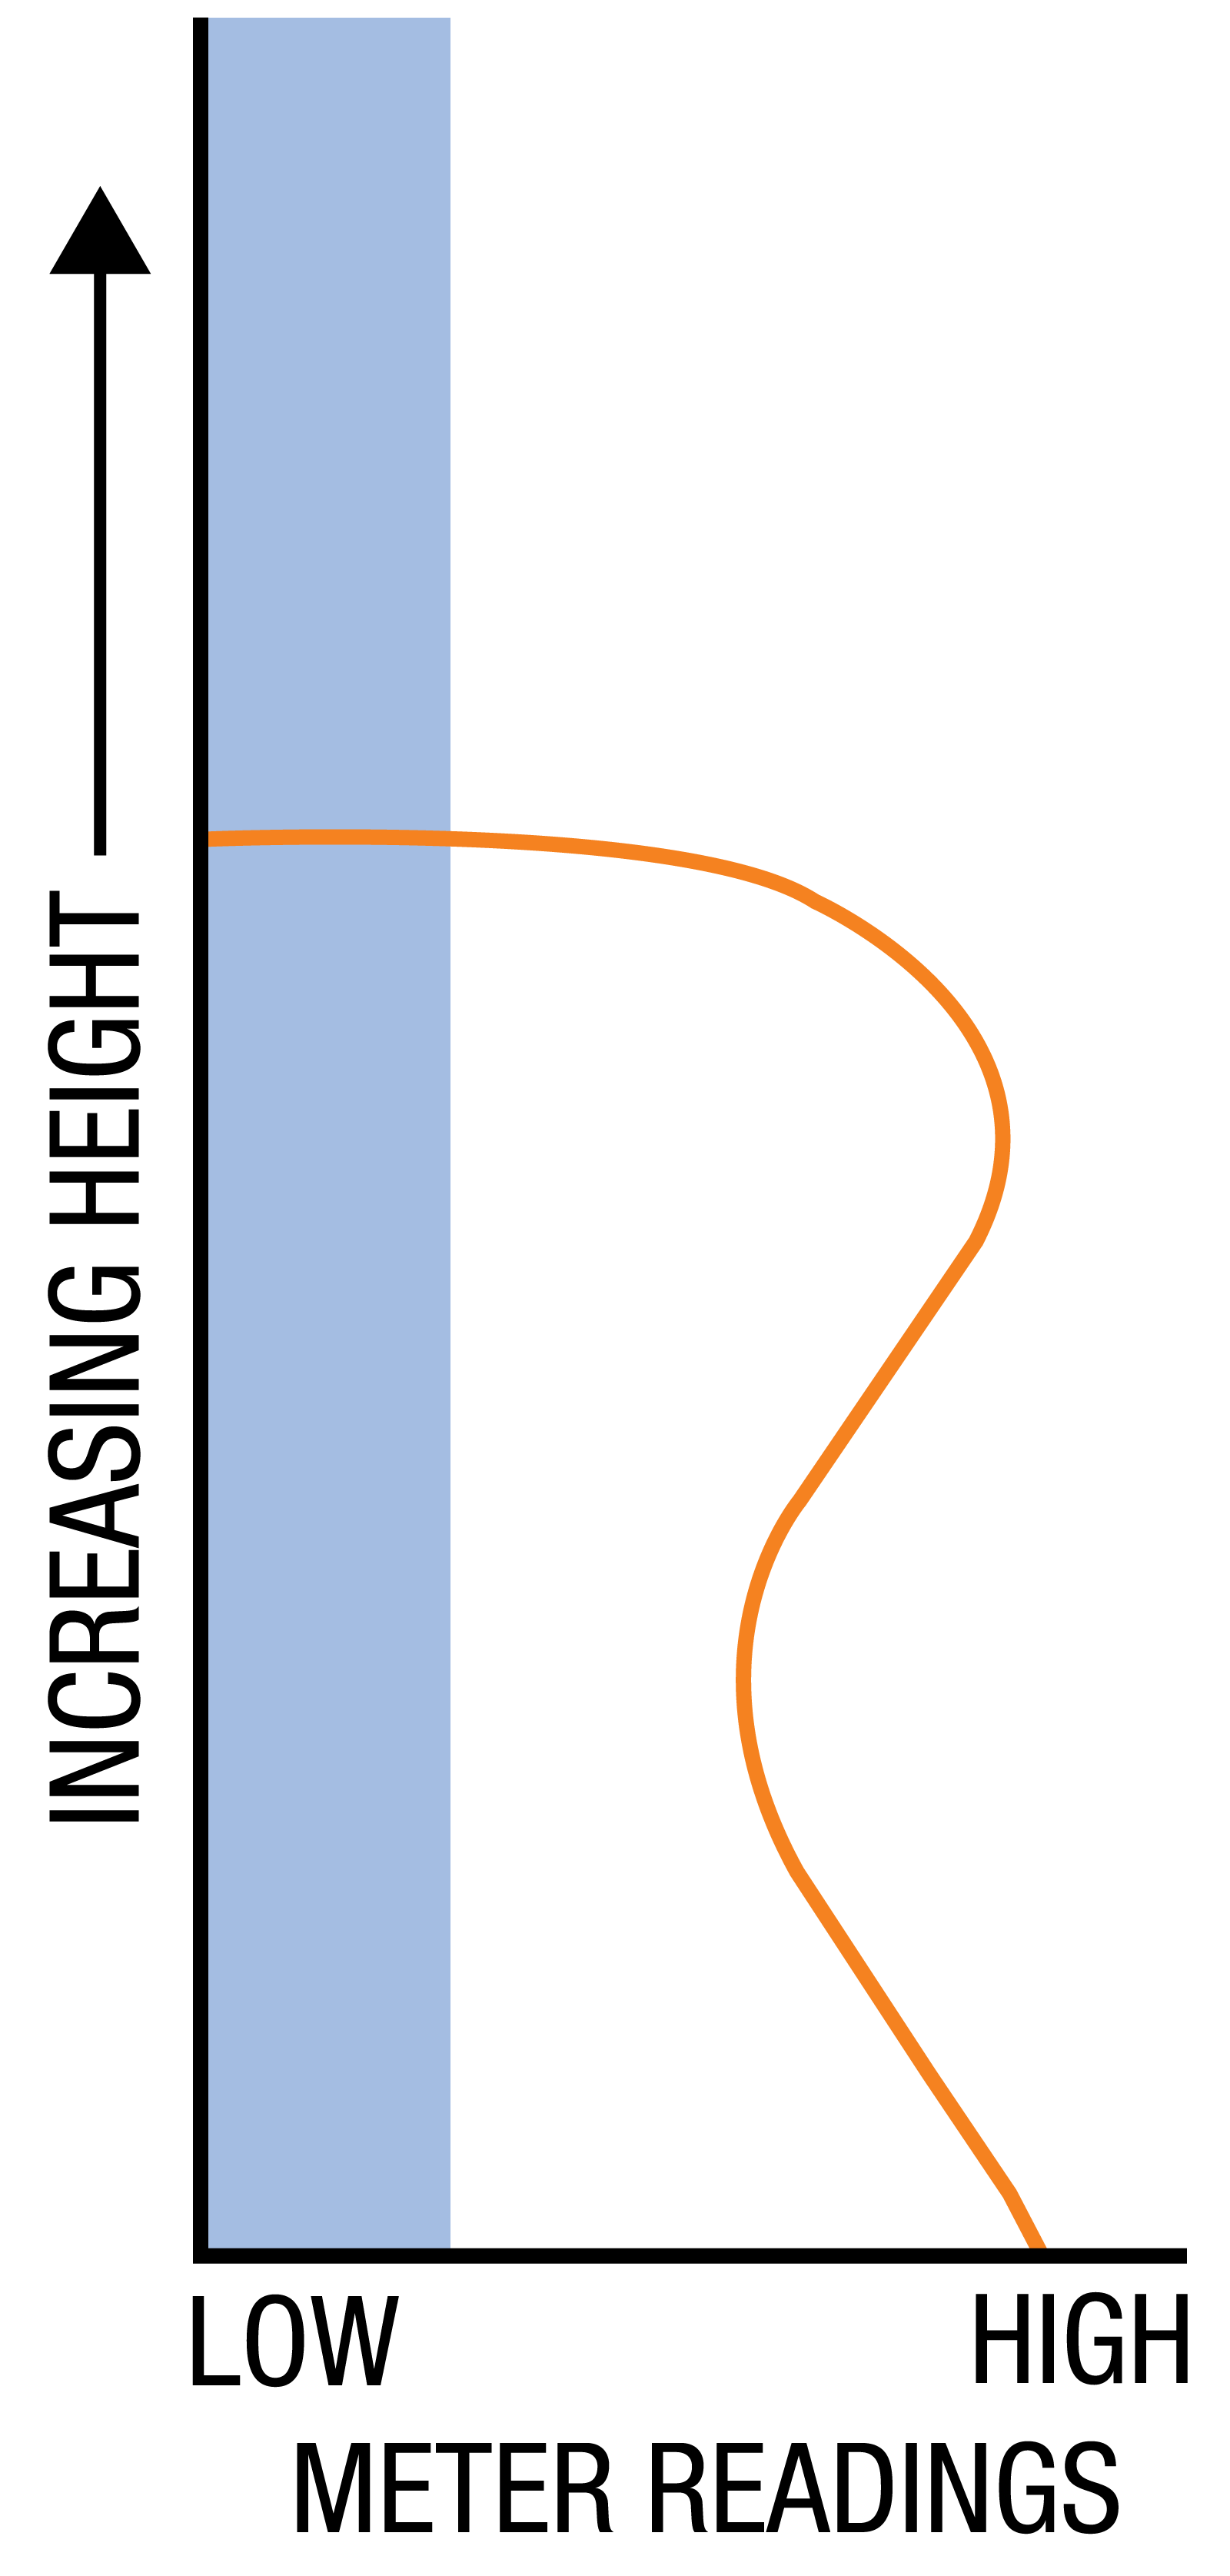
1. External Examination:
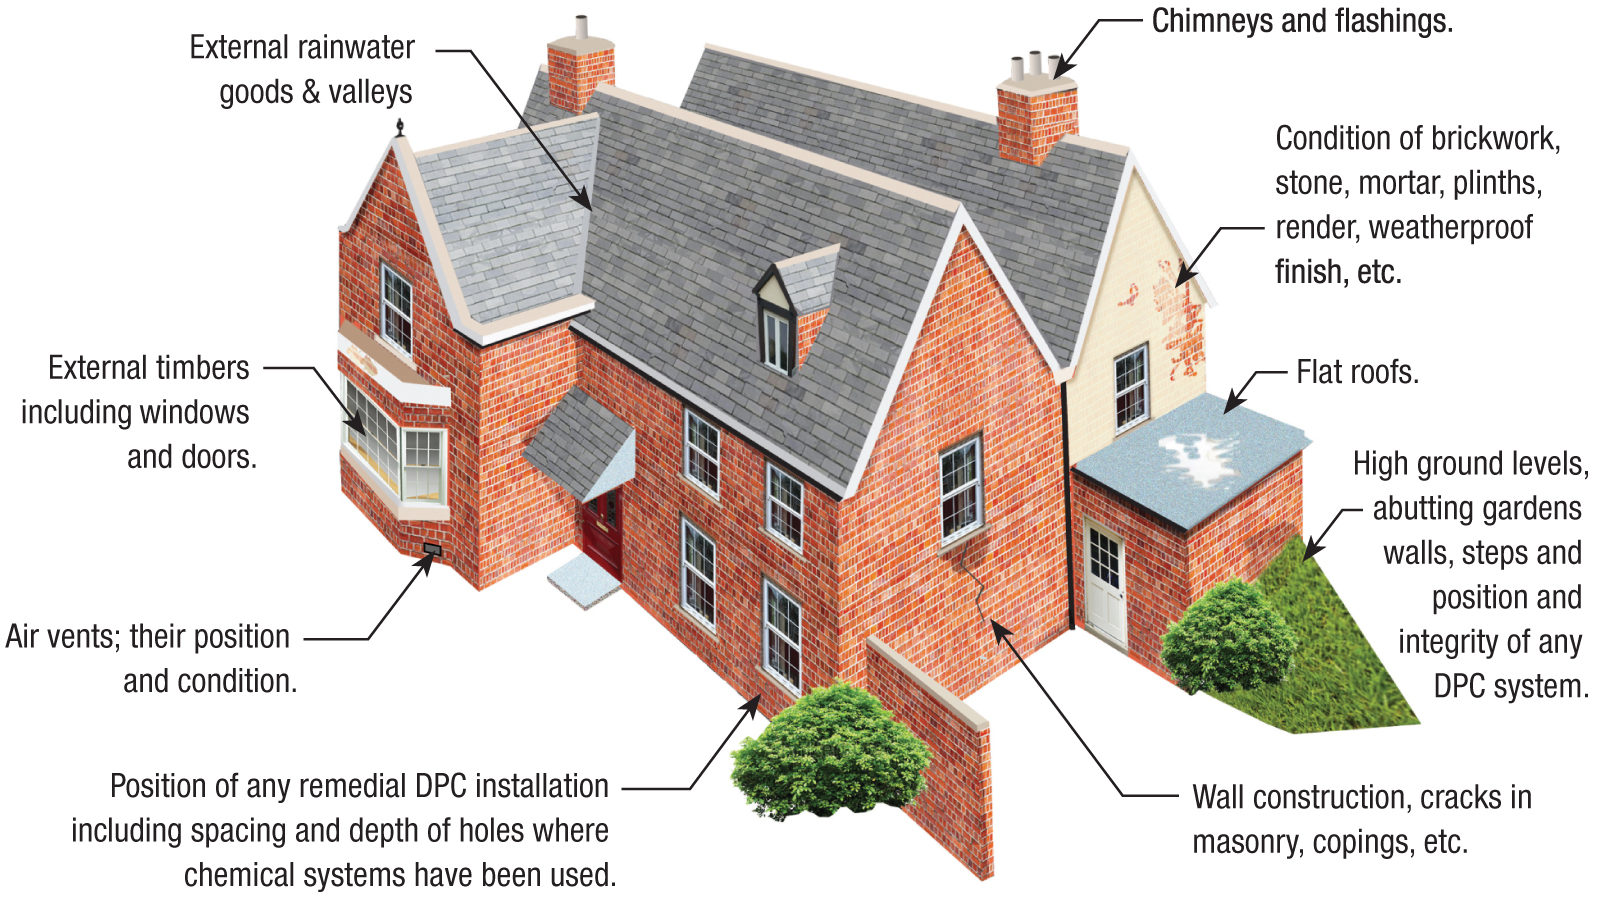
Figure 5: External examination
2. Primary Internal Examination (Visible Signs):
- Fungal decay in skirting and / or other timbers.
- Peeling / blistering wallpaper, peeling / blistering paintwork.
- Efflorescence.
- Mould growth, staining.
- Damp / wet patches, water droplets, water runs.
3. Secondary Internal Examination:
(assuming correct use of properly functioning and calibrated electrical moisture meter)
- Examine both perimeter and centre of solid / timber suspended floors.
- Check moisture content of timber skirting (top and base).
- Examine and check condition of the floor / wall junction, edge of DPM of floor.
- Check any remedial damp‐proof course installation including position and depth of holes (if inserted from inside).
- Note distribution of moisture meter readings both vertically and horizontally on the surface of walls.
- Check for efflorescence beneath wallpaper finishes.
- Note any use of polystyrene sheet / foil backing beneath wallpaper.
- Note any new plasterwork, height of replastering, its condition and if possible its type, e.g. renovating, sand / cement, lightweight premix gypsum, etc.
- Lift floorboards and thoroughly examine timbers and subsite.
- Check for suitable subfloor ventilation.
- Look for internal plumbing defects and water dripping from cold pipes as the result of condensation.
Tertiary Internal Examination:
- Check (if possible) on history and use of property.
- Evaluate ‘lifestyle’, e.g. use of central heating, paraffin or flueless gas heaters, drying, washing and cooking, degree of ventilation, etc.
Once any form of dampness has been identified then it is essential that the risk of decay to any timbers is assessed and appropriate remedial measures undertaken.
REMEMBER: a combination of dampness and wood leads to potential rot.
The primary task of the investigator is to correctly identify the source of dampness. This is best achieved by a process of investigation and elimination. Extreme care must be taken, for example, in the winter months to eliminate condensation as one of the potential causes of dampness. A basic guide to dampness problems is given in Table 1 below.
| Symptom | Diagnosis |
|---|---|
| Decayed skirtings, damp base of wall, damp around edge of solid floor |
|
| Surface efflorescence just above skirting/floor |
|
| Dampness at base of wall up to 1.5 m [1] in horizontal band |
|
| Stains, especially in horizontal band, noticeably damp in humid conditions |
|
| Damp patches on surface increasing in size during / following rain; sometimes heavy efflorescence |
|
| Stains / damp / efflorescence on chimney breast |
|
| Mould growth on cold surfaces, window reveals, ceiling / wall junction, etc |
|
| Free surface water, water run marks, water droplets, dripping water |
|
| Damp timber floorboards around edge of floor but not in centre |
|
| Floorboards damp away from wall |
|
| Damp at first floor level and above |
|
Note: disintegration of cementitious renders may be due to sulphate attack.
[1] May rise higher depending on conditions
It is essential that the survey is carried out thoroughly and that all potential areas of dampness are noted. Special vigilance must be taken where dampness, and hence decay, may be unseen such as beneath timber suspended floors. Wherever timber and dampness coexist the risk of decay should always be reported and the client must be put on notice to that effect.
Comparisons of different types of dampness are given in Table 1. During the survey, there may be several signs of dampness and it is important that they should all be identified as far as possible.
Where there is more than one source of water ingress then it may be difficult to distinguish between their origins. Generally, the presence of active rising dampness is indicated by excessive moisture at the base of the wall which slowly declines further up. This moisture gradient is usually observed up to heights of 1.5 metres but, depending on conditions and the structure of the masonry, it may rise to greater heights. Sometimes, a ‘tidemark’ can be observed running almost horizontally along the wall and the area below it being obviously damp.
Masonry contamination with a ‘band’ of hygroscopic salts will also confirm the presence of a rising damp but will not differentiate between an active or past complex.
Use of Electrical Moisture Meters
The proper use of a surface electrical moisture meter can give a useful indication as to the existence of a rising damp complex but cannot give absolute proof, especially where remedial works have been previously carried out. (See Property Care Association leaflet DP1 “The use of Moisture Meters to establish the presence of Rising Damp”).

Electrical moisture meters should be used to obtain a “moisture profile” by taking readings at regular intervals (usually 100 mm) vertically up the wall being investigated. The typical moisture profile for walls suffering from rising damp is high surface readings on the lower sections of wall followed by a sudden ‘cut‐off’ at the top of the rise of moisture.
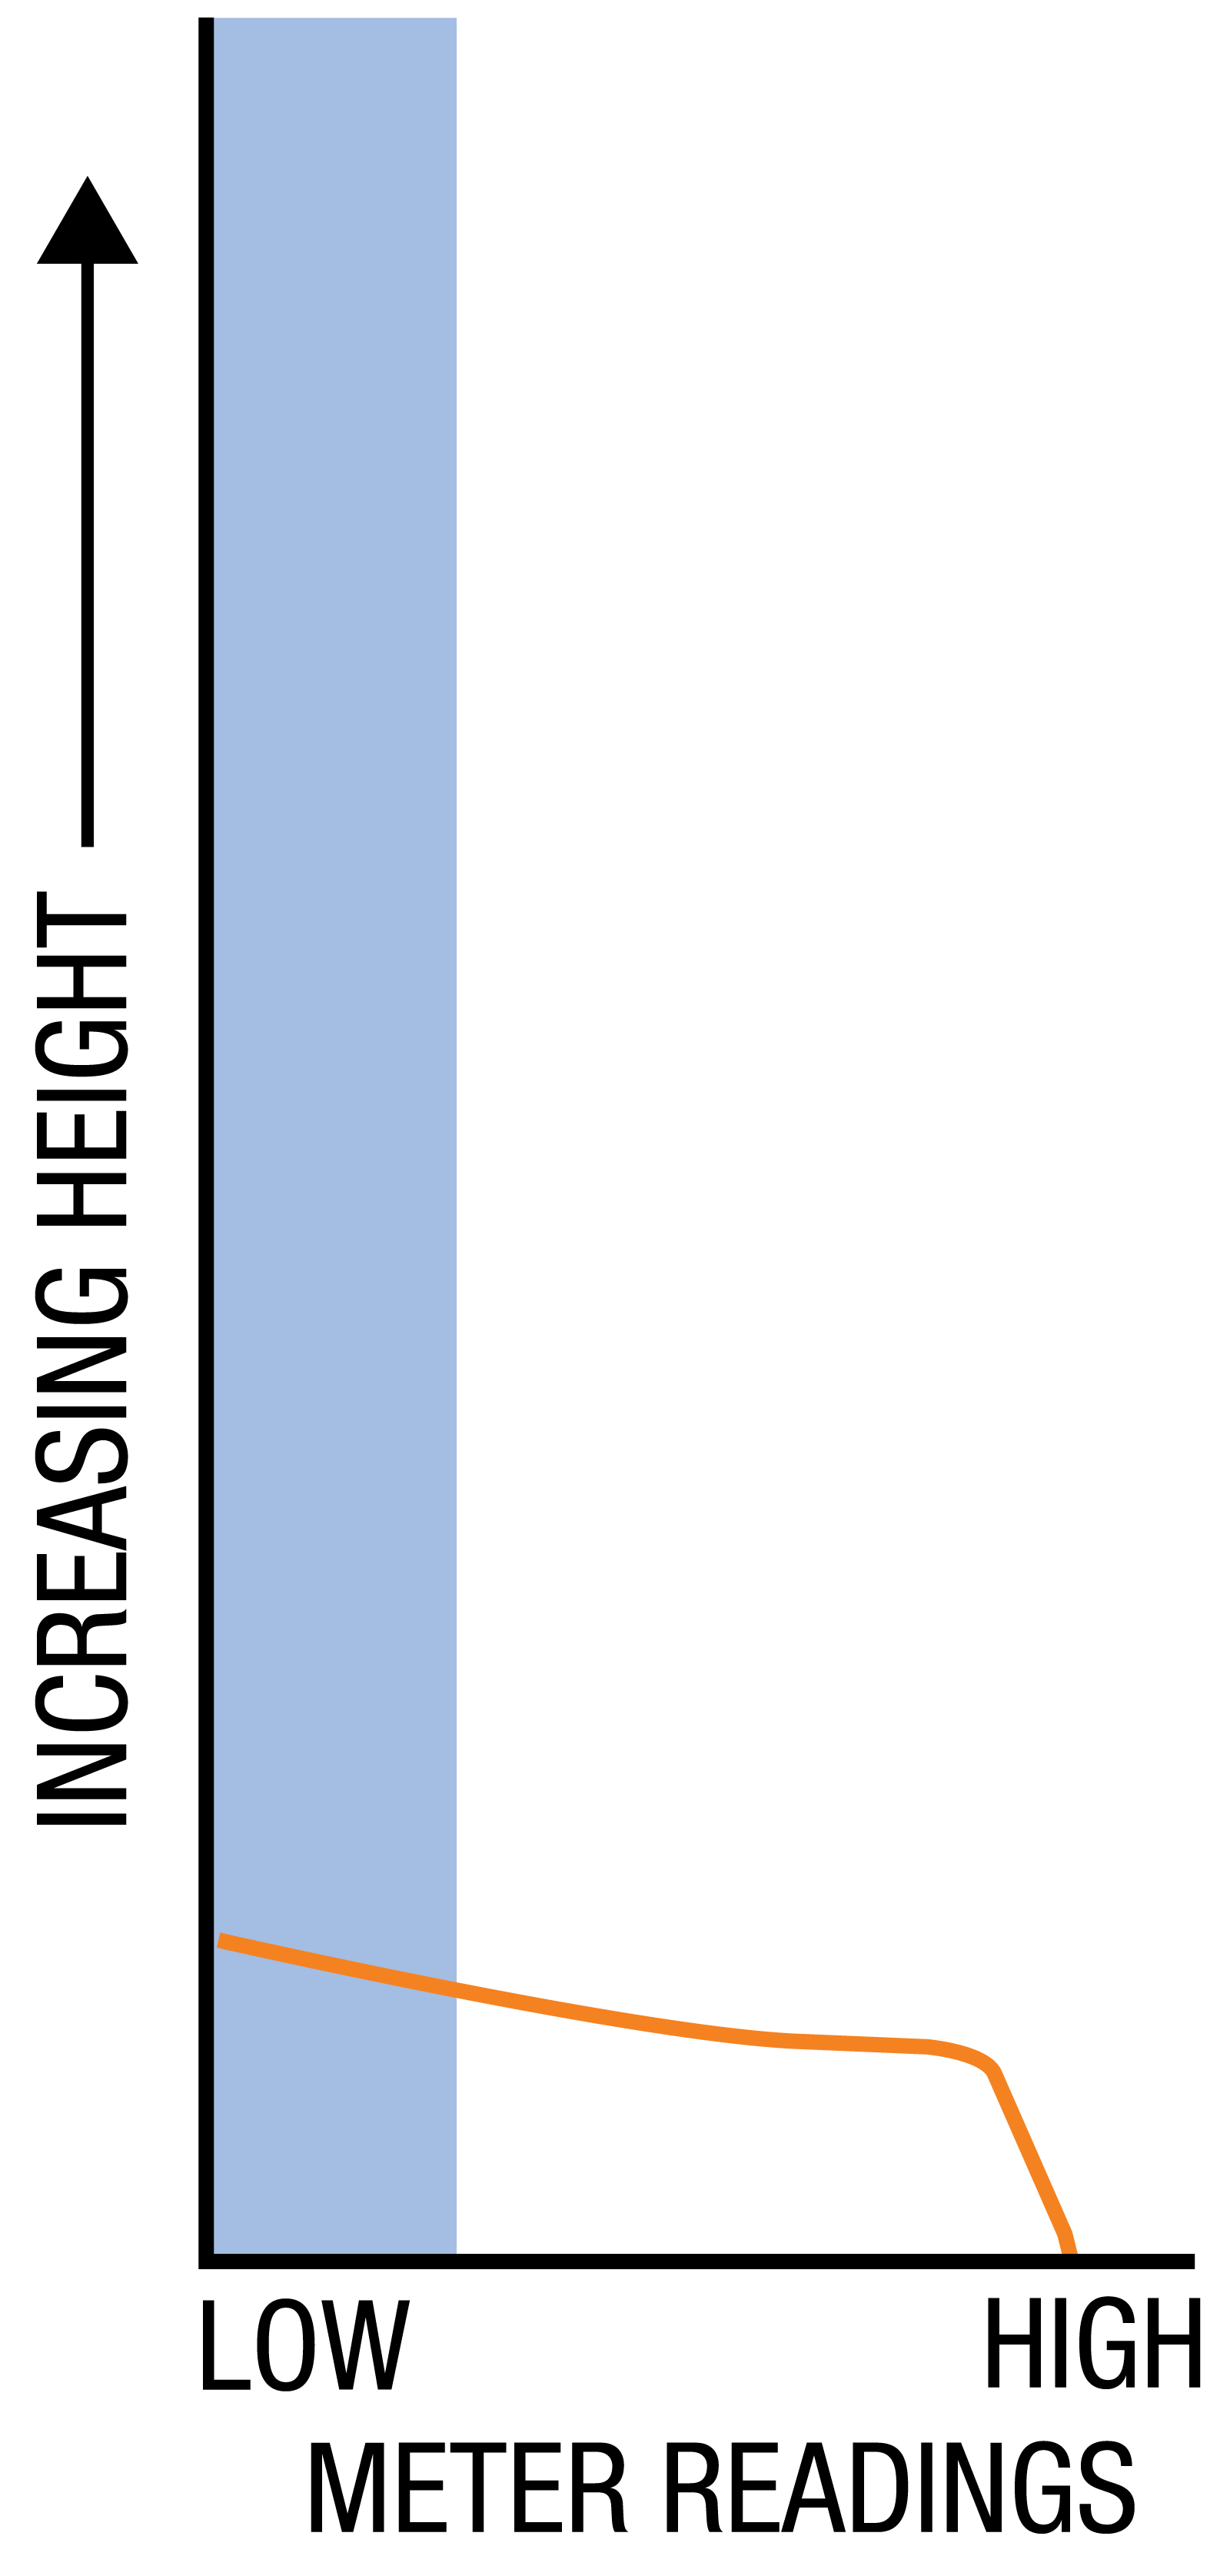
However, other meter reading patterns can be obtained during investigations. Some possible interpretations are given in the table below (see Figure 6). Please note that it is the pattern of the readings which are important.
-
Gradual decline in readings followed by sudden cut‐off – typical of rising damp
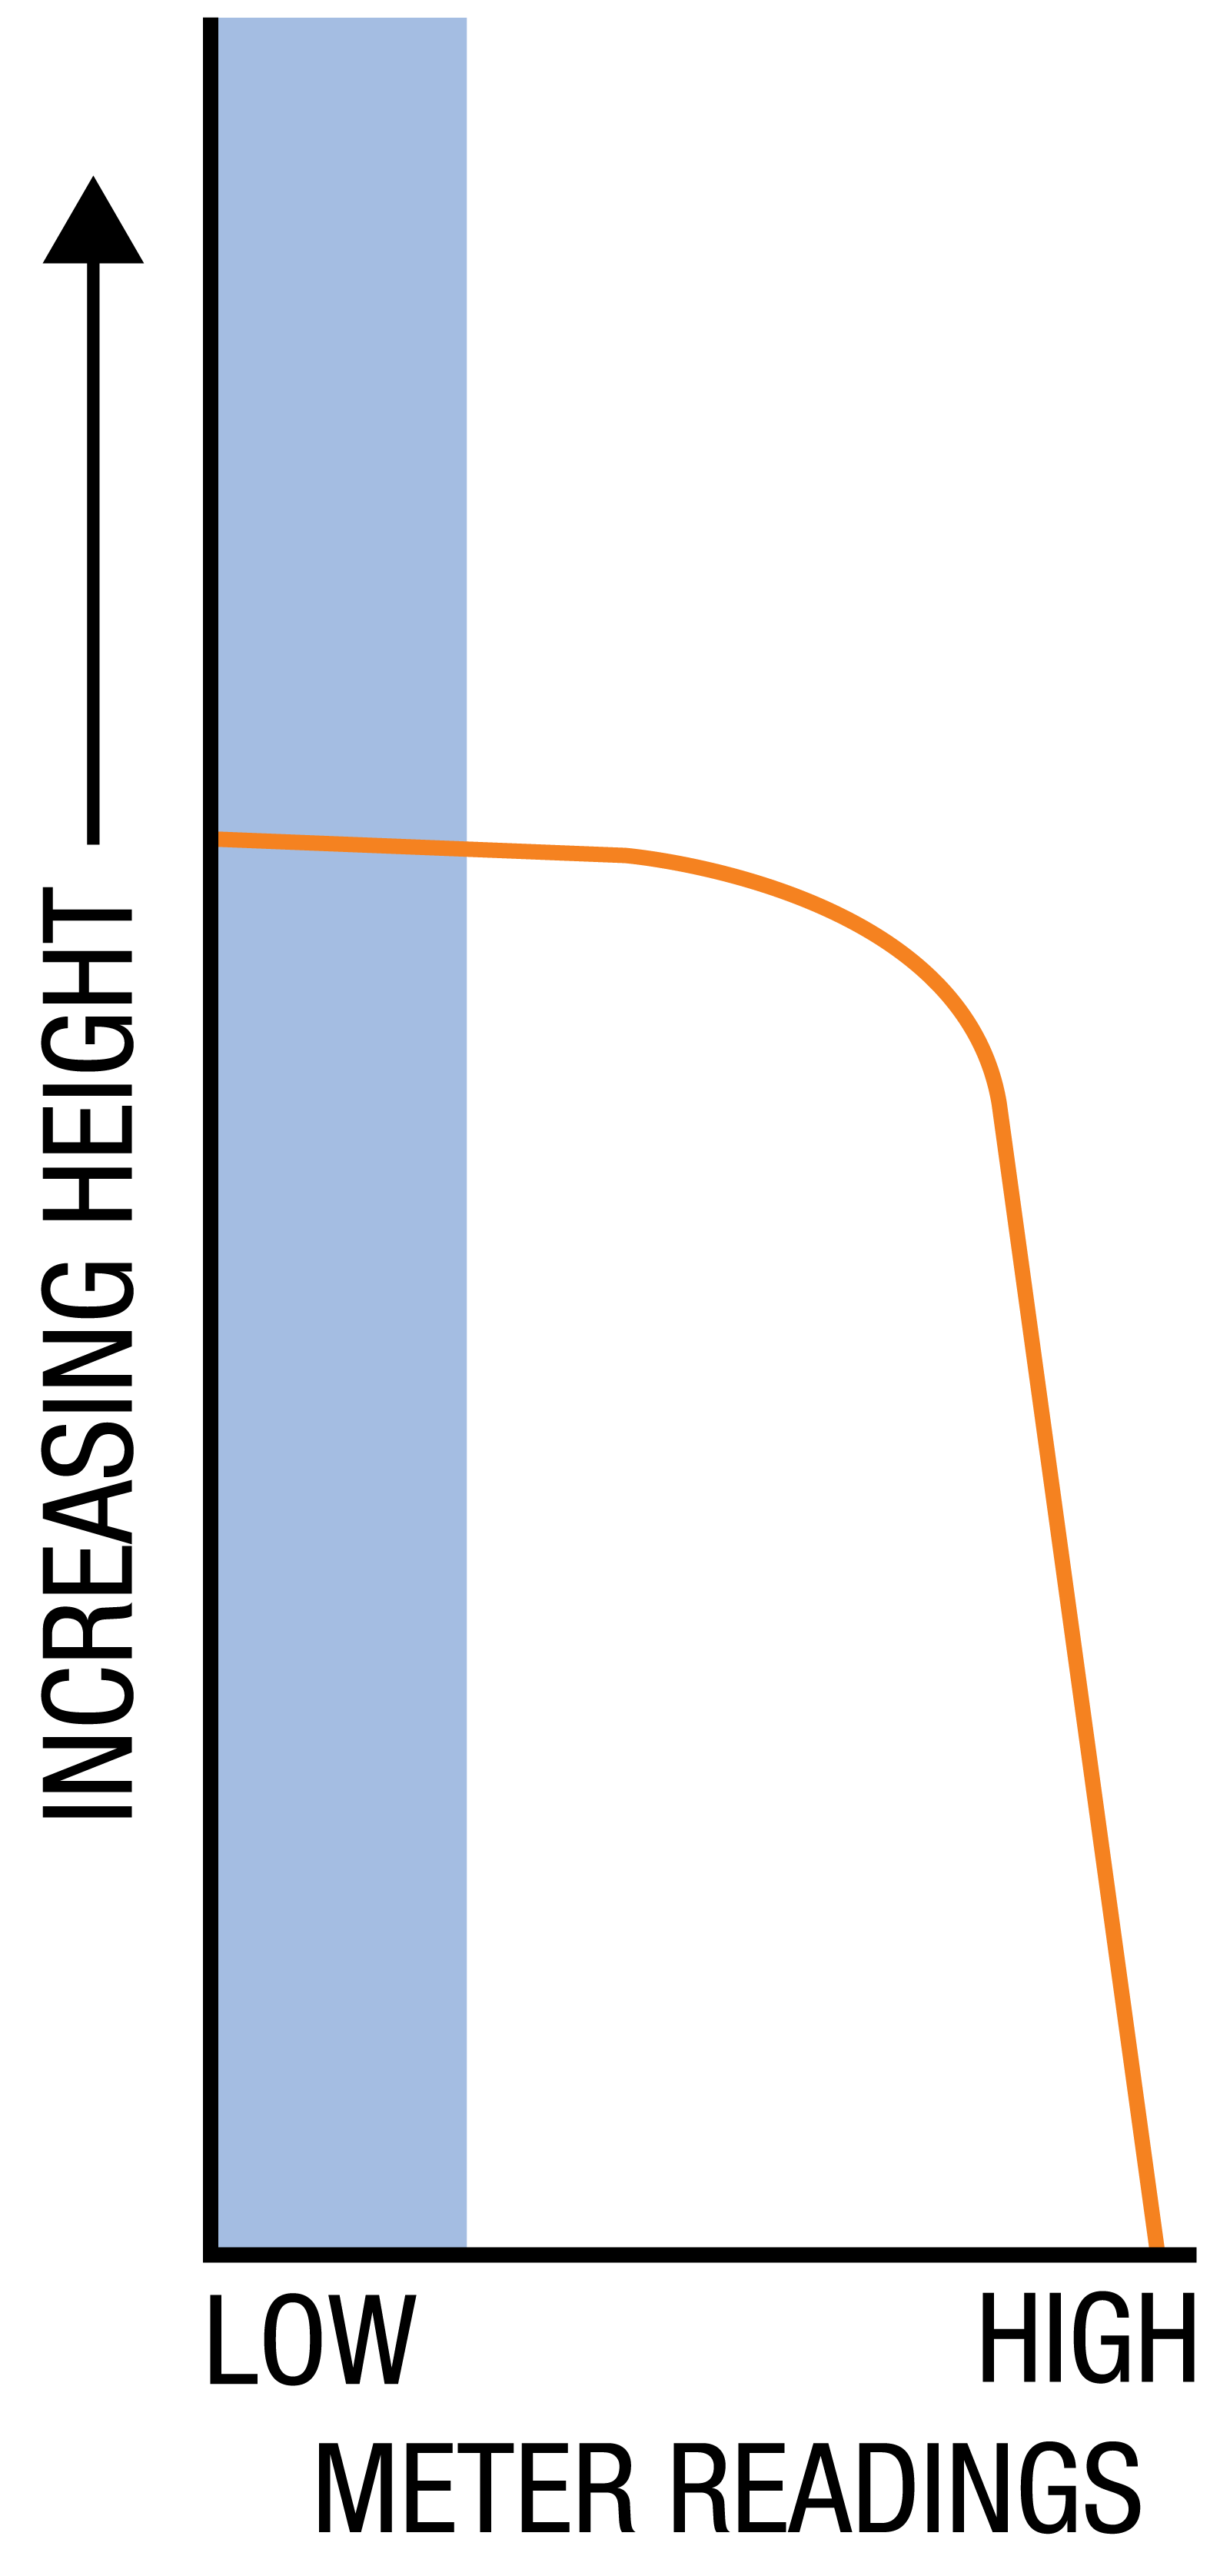
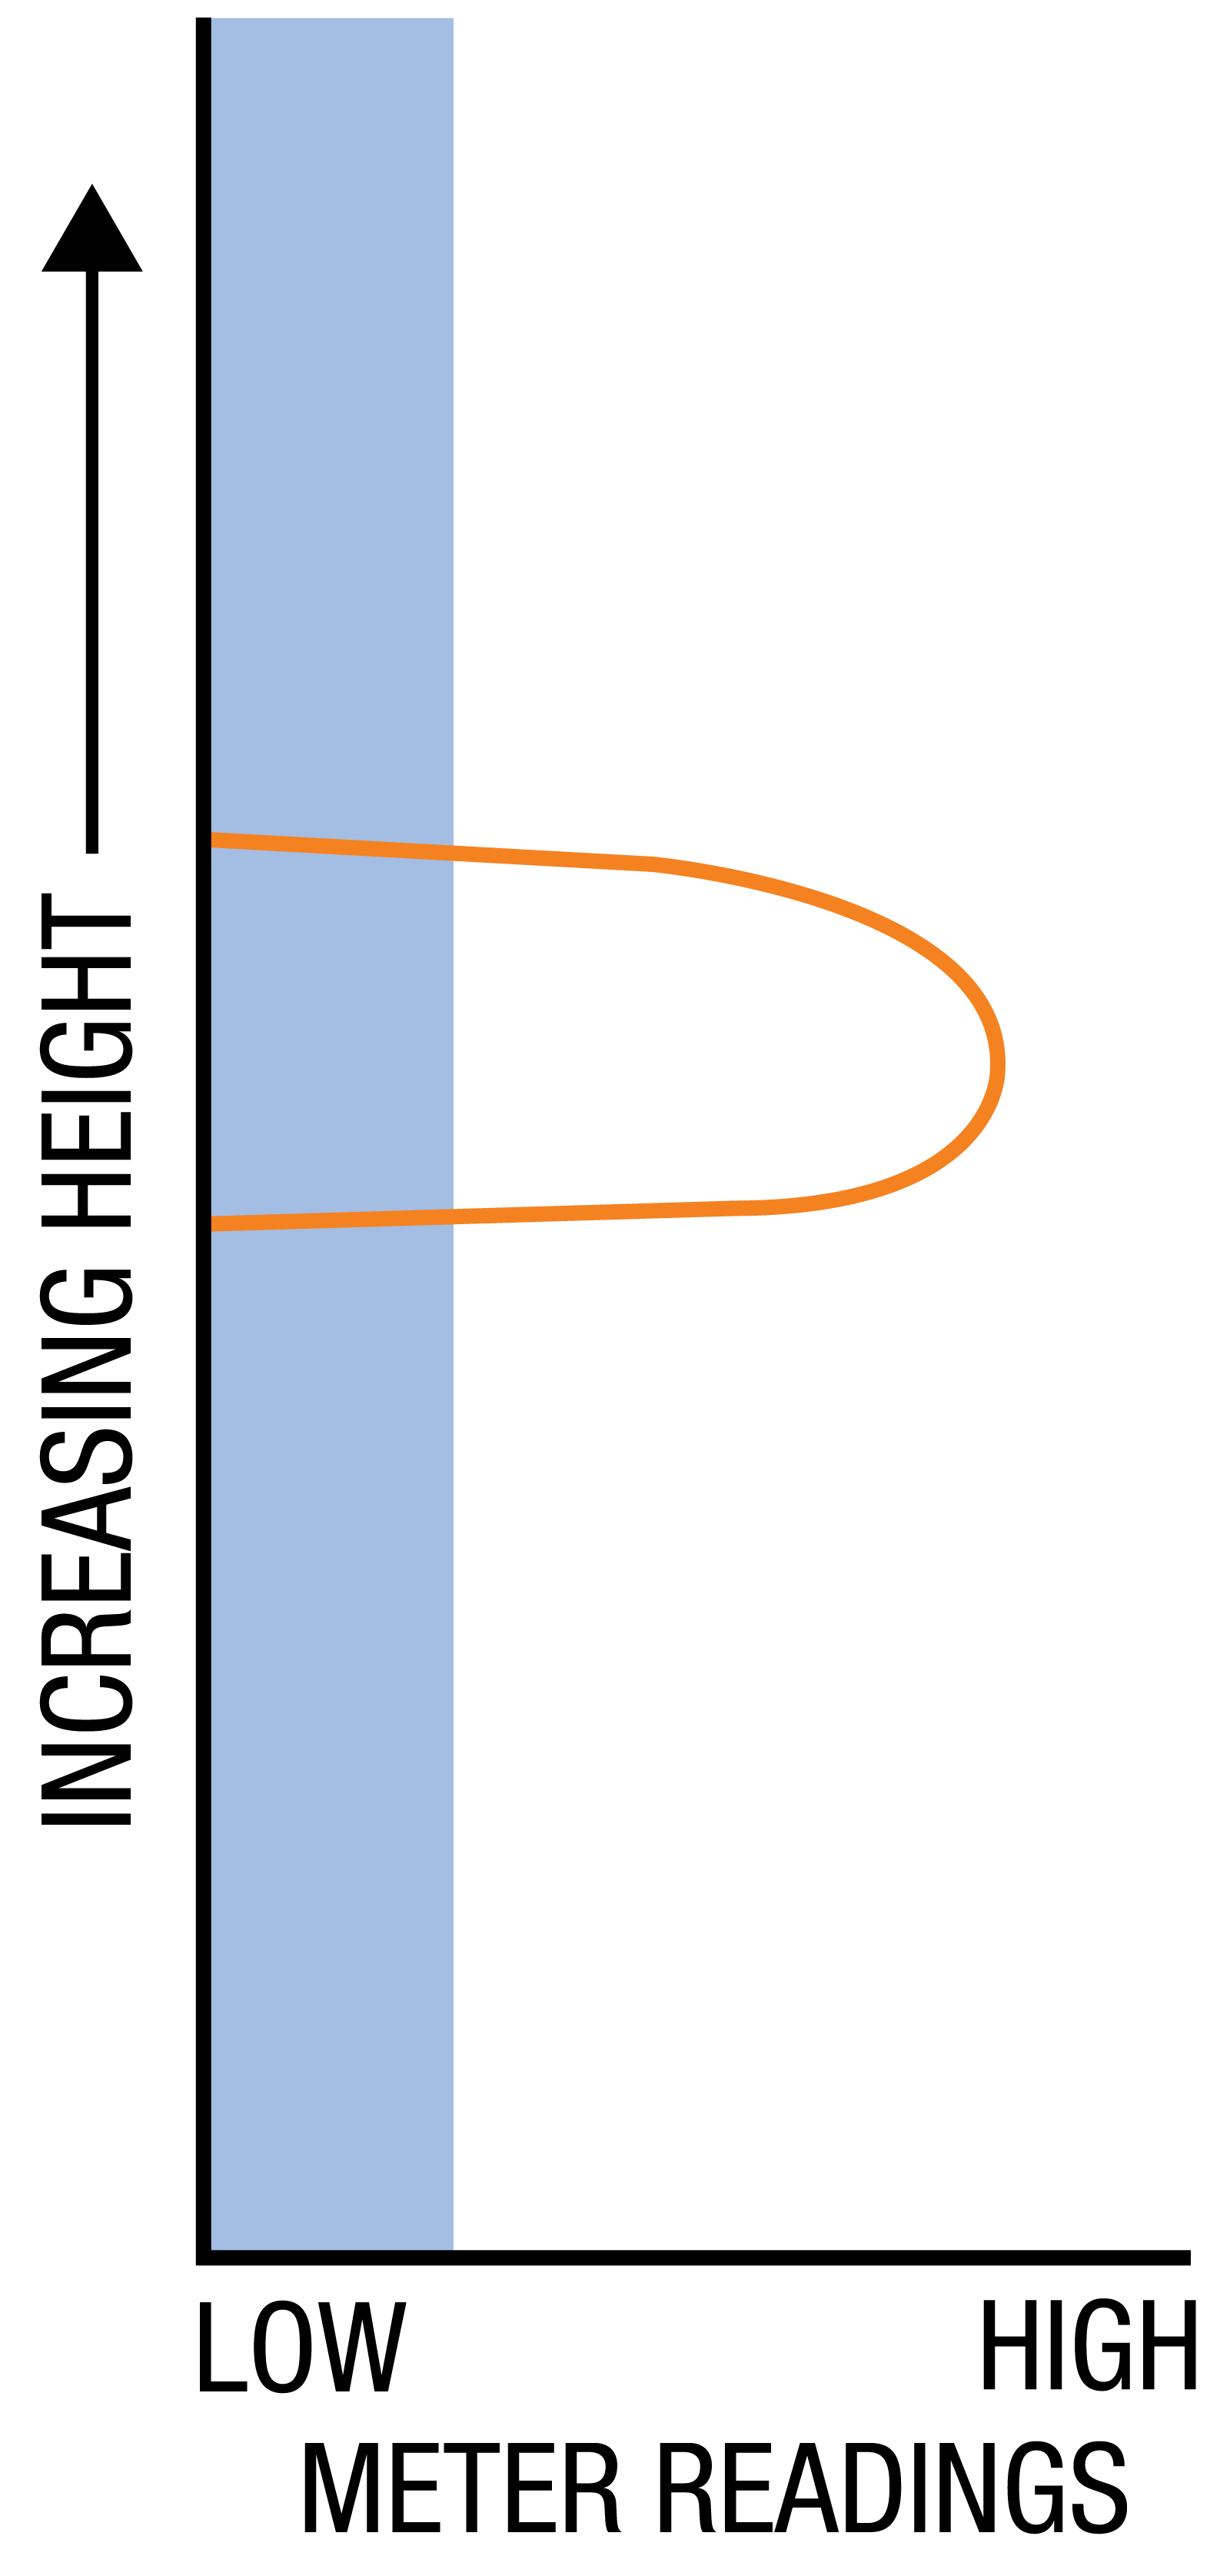
-
Increase in readings followed by sudden cut‐off – typical of controlled rising damp.
High readings at top due to salts remaining in wall.
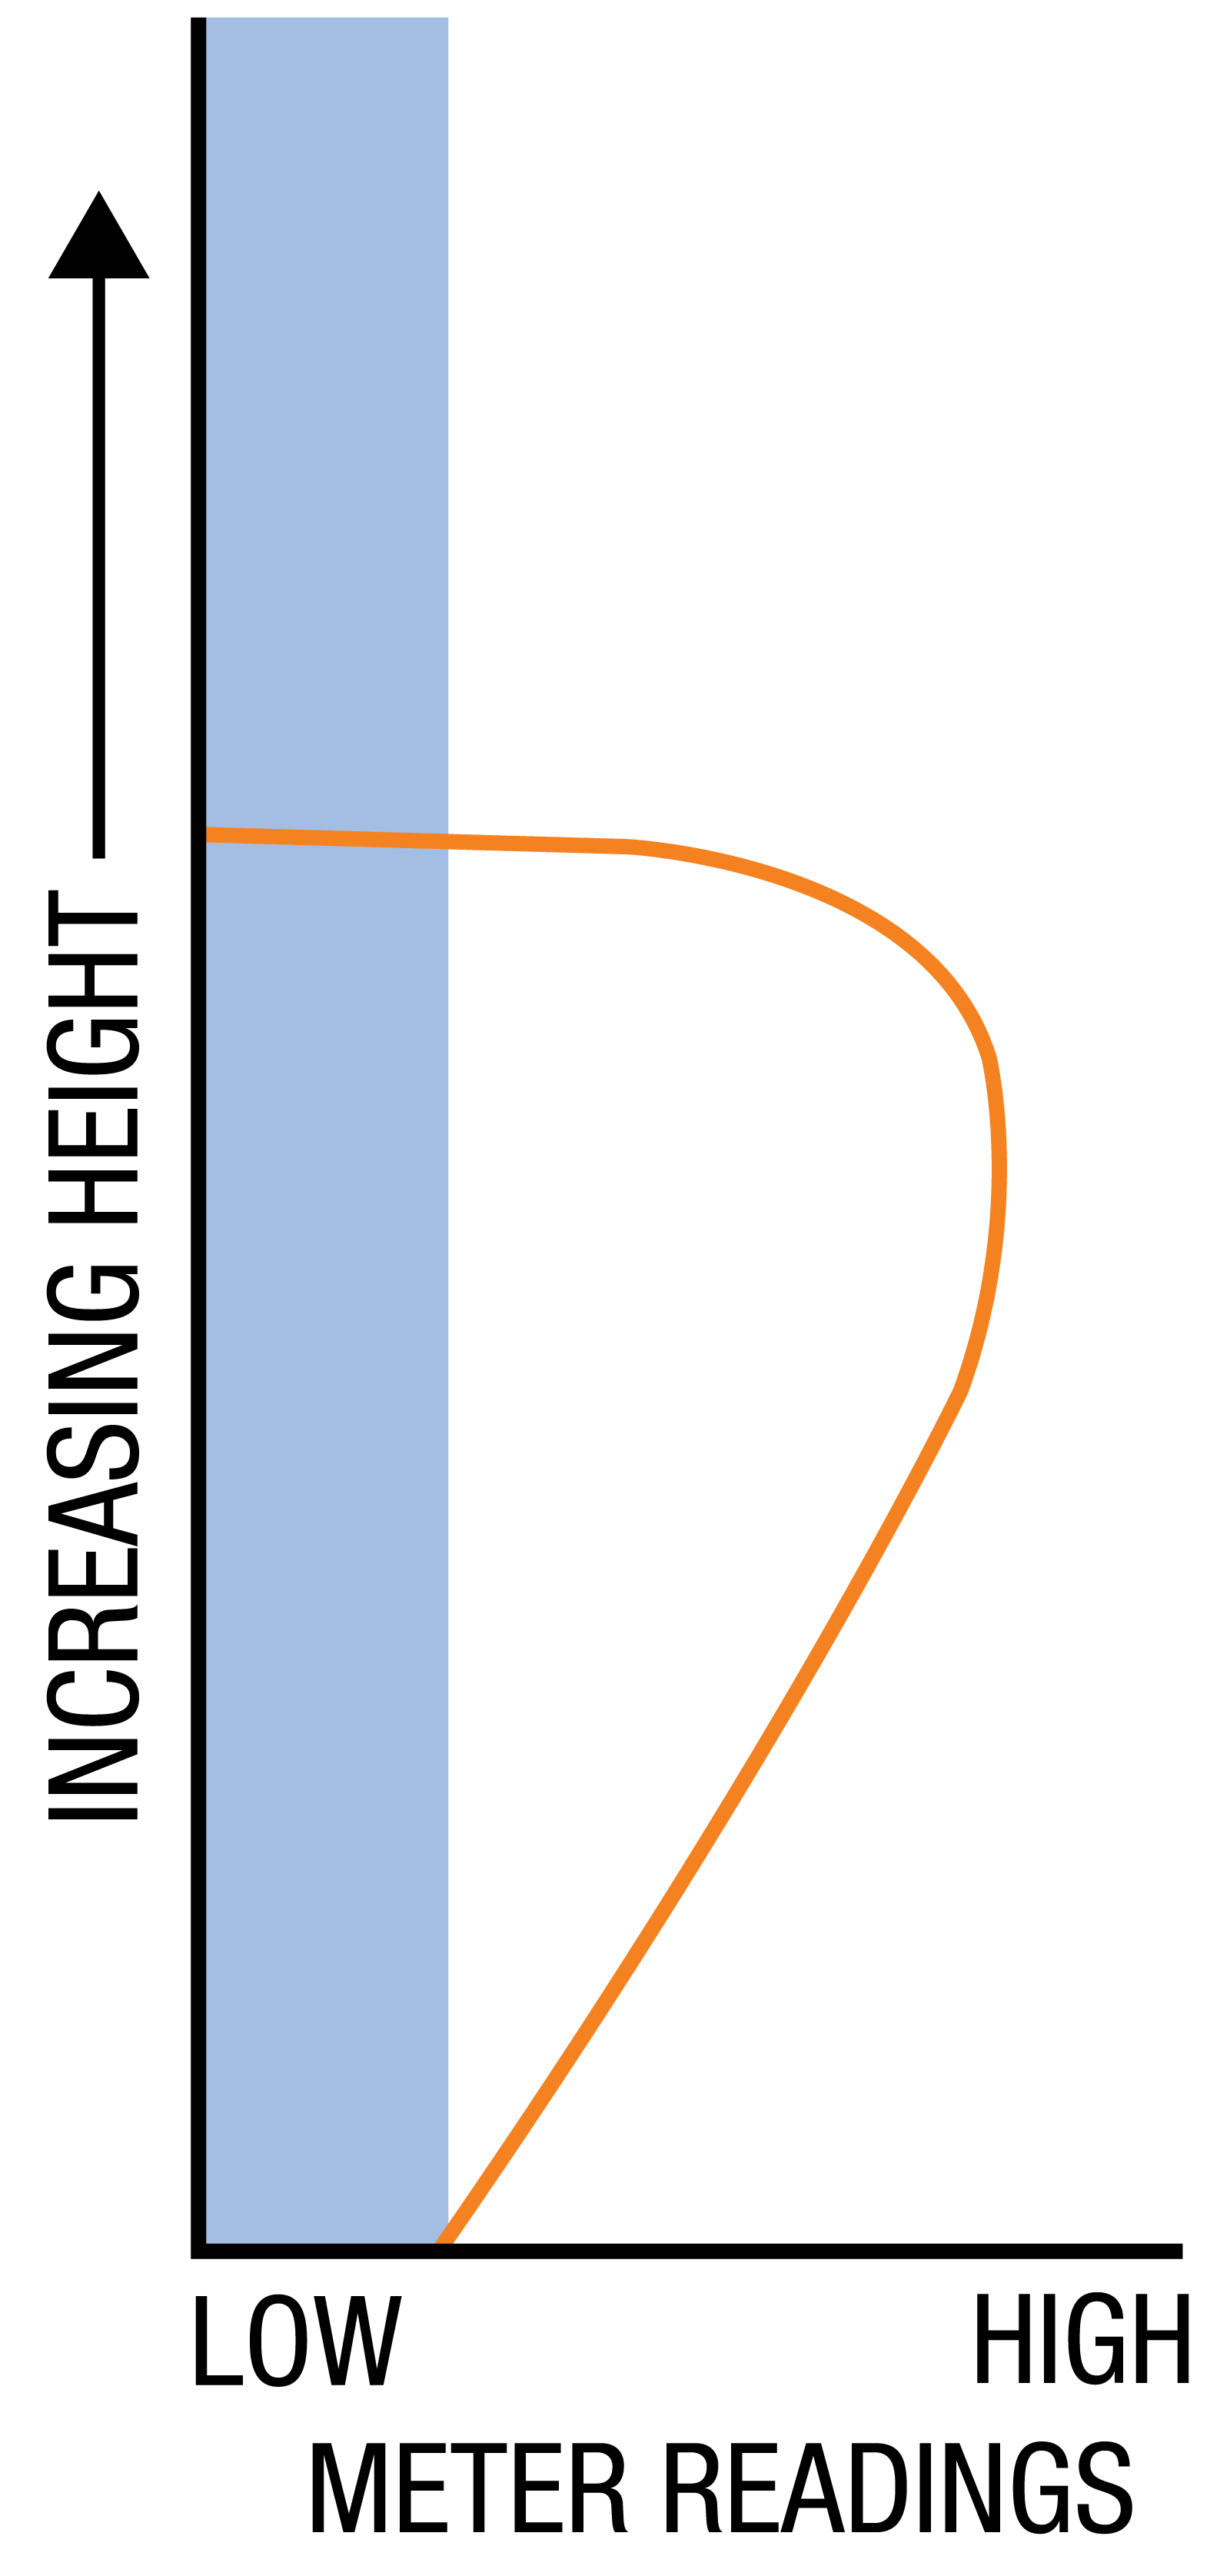
-
High readings at base followed by slight dip then increase – typical of partially controlled rising damp.
-
High readings just above skirting or at very base of wall. Typical of floor / wall junction problem.
-
Zero or low readings on lower part of wall then a band of very high readings. Typical of failed damp‐proofing.
Replastering is holding damp / salts back at base of the wall but damp is rising above the replastering
-
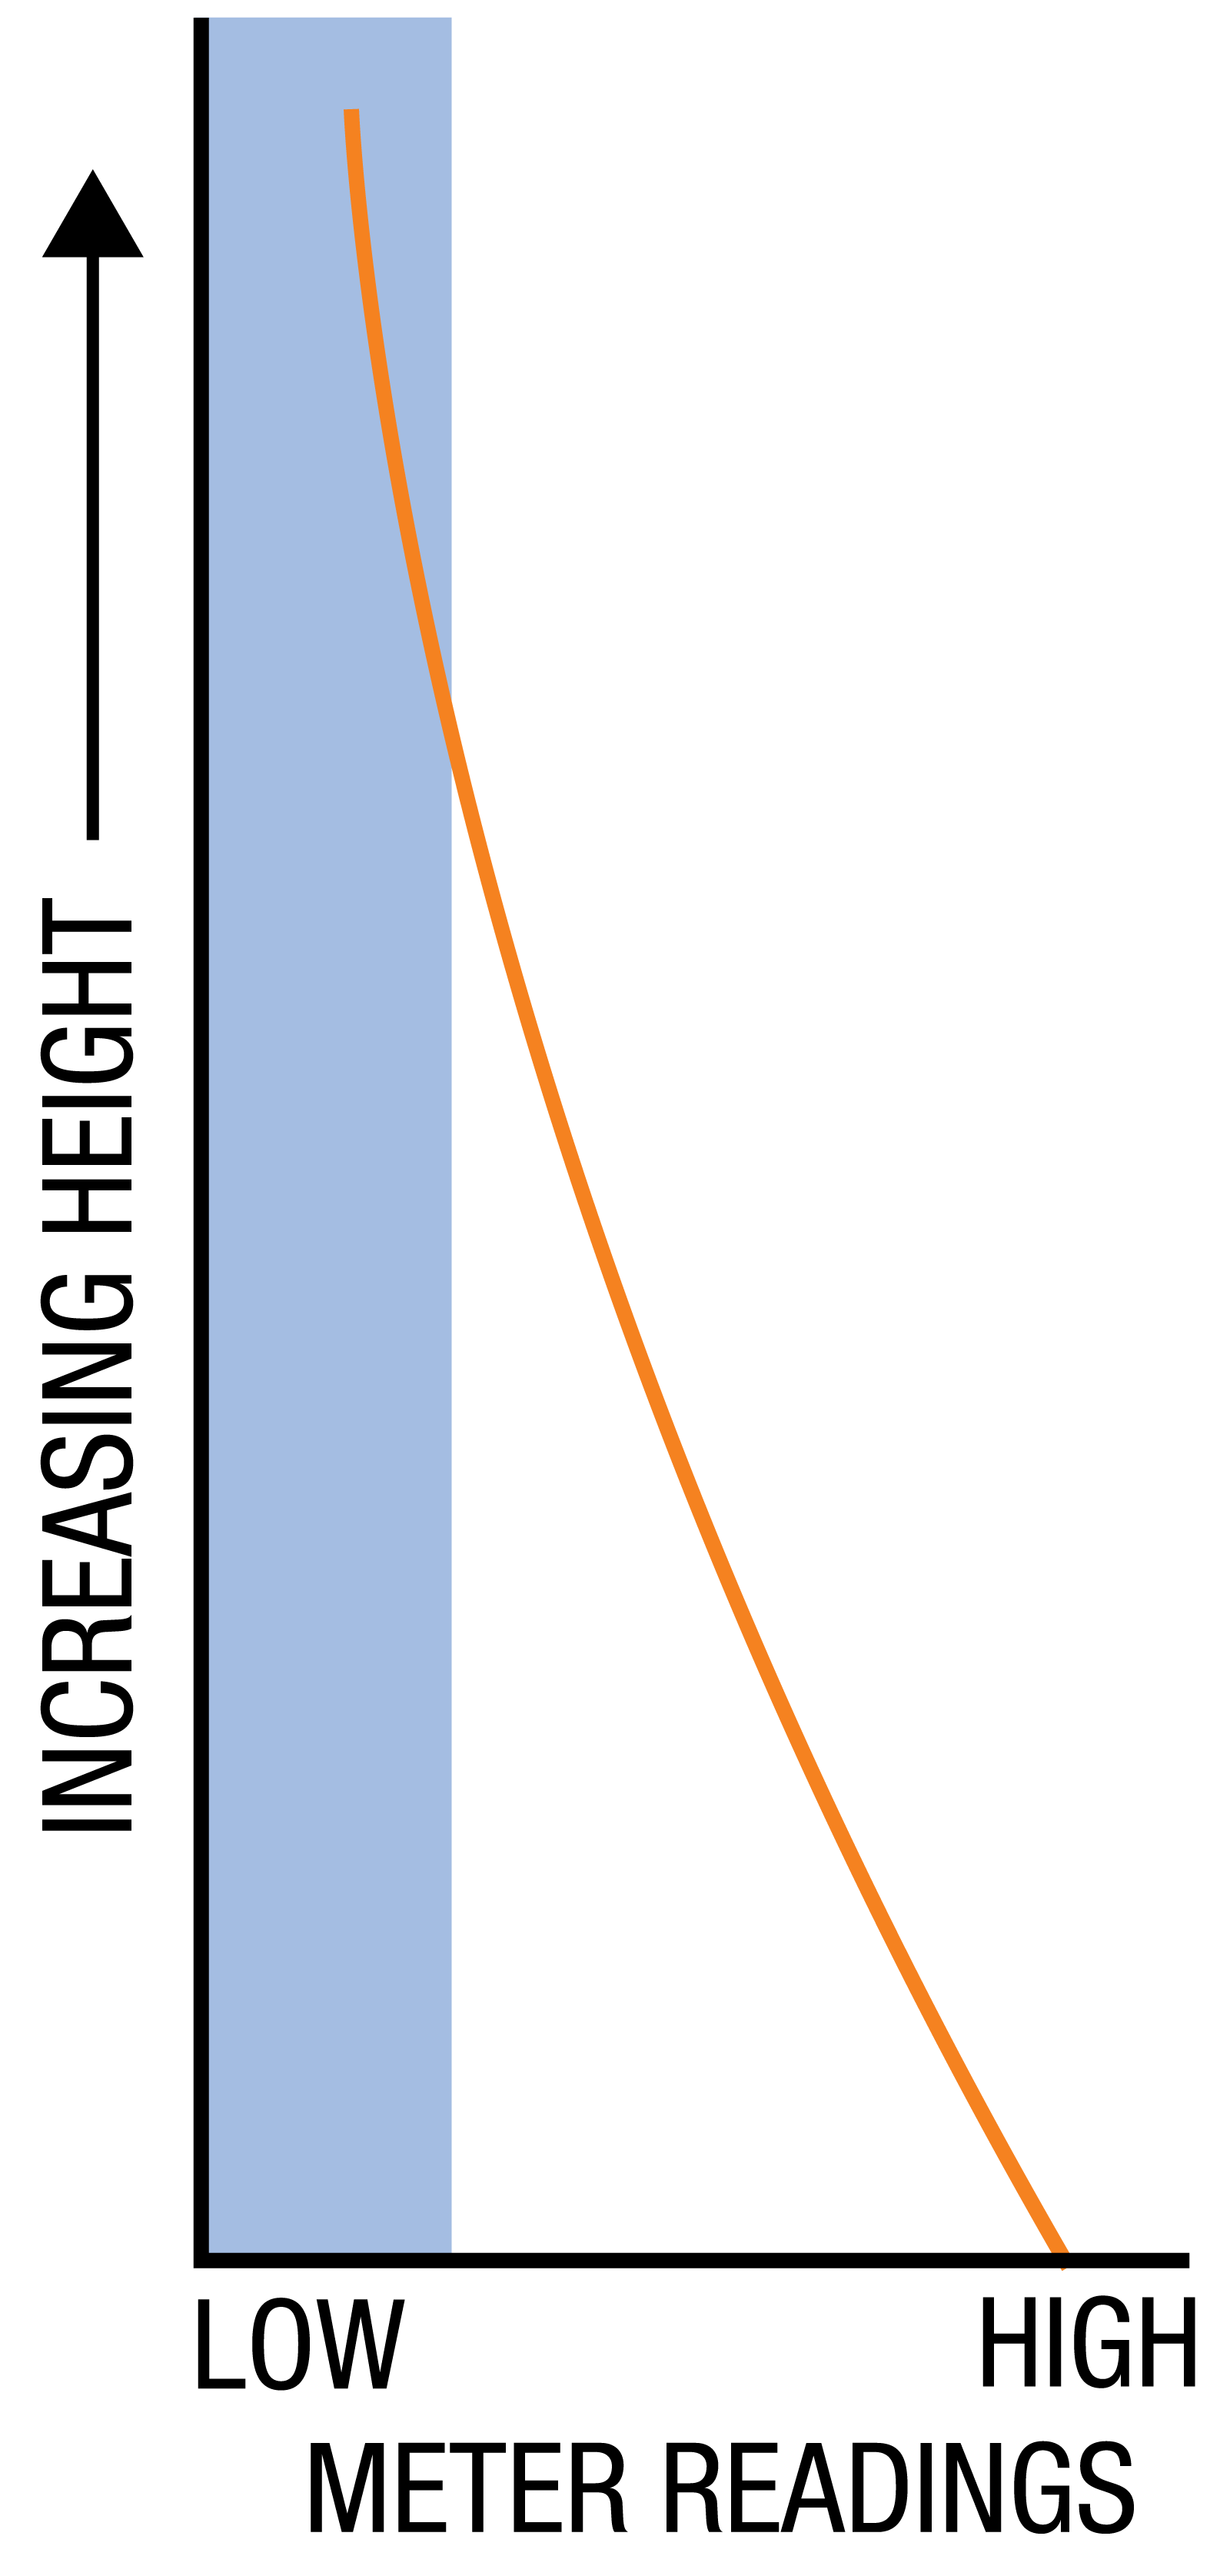
Steady decline in readings – often found on wall‐papered or semi‐permeable wall finishes. Typical of condensation or high humidity.
Quantitative Measurements
For a precise evaluation of potential rising dampness, quantitative measurements of moisture are required and methods such as those described in BRE Digest 245 ‘Rising damp in Walls: diagnosis and treatment’, should be used. This involves the use of drilled samples taken in a vertical series and determining the hygroscopic and capillary moisture content of each sample. The capillary moisture content represents water ingress and therefore its presence and distribution in the vertical profile will indicate whether rising damp is actually occurring or not. This technique will also identify dampness problems caused by heavy contamination with hygroscopic salts rather than water ingress.
Finally, it must be understood that dampness can rise to heights well in excess of 1 metre, a figure frequently quoted as the maximum height to which dampness can rise.
The Property Care Association leaflet DP9 “Guidelines to Survey Report Writing” should form the basis on which the report should be structured.